
Video-Tutorial
Template manager
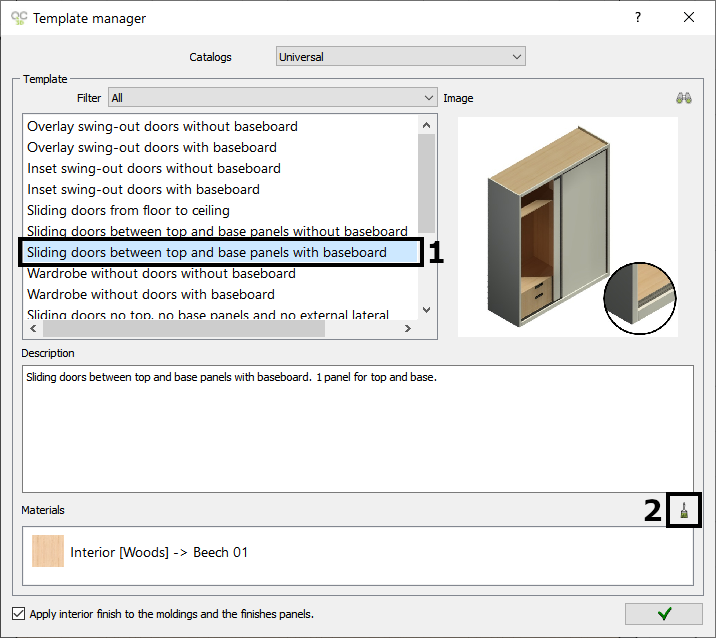
After finishing the architecture, the “Template Manager” window appears, where you can select a template from which to start designing your wardrobe, according to the type of doors: swing-out doors, sliding doors, or even a wardrobe without doors.
In our example, select option 1) “Sliding doors between top and base panels with baseboard“, and press this button 2) to change the material of the wardrobe interior:
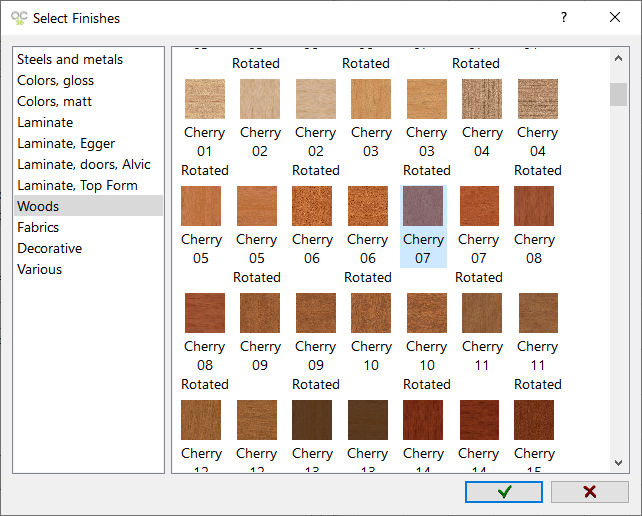
The following window appears, where you can select the new material for the interior. In this example, select “Woods -> Cherry 07” and press OK:
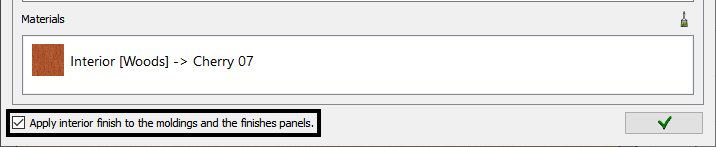
Now, back in the “Template Manager” window, keep this option selected so that the moldings and finishes panels have the same material, and click OK:
Catalogs
The “Closet” window will appear, where you can modify the measurements of the wardrobe, the door series, moldings, and finishes. This initial stage is called “Catalogs” .
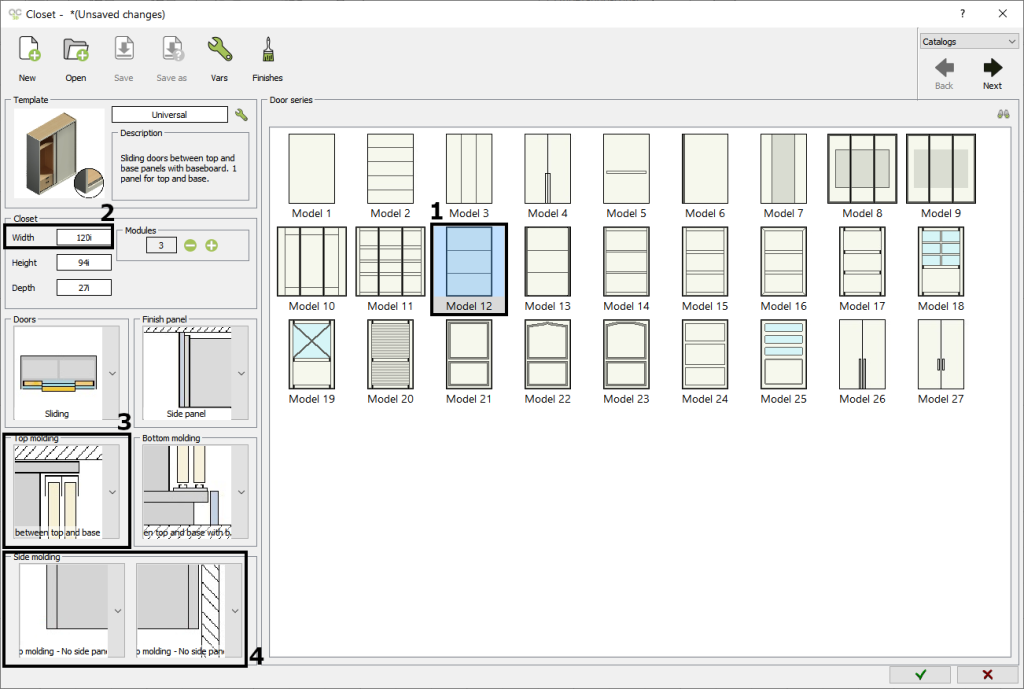
- Select the “Door Series” the model “Model 12” .
- Modify the “Width” of the closet to 120 inches.
- Select in “Top Molding” : “Sliding doors between top and base – No molding” .
- Select “Side Molding” option “No molding – No side panel” as shown in the screenshot.
Finishes

Doors
In this stage, the wardrobe doors are configured: door setup, models, handles, and materials.
But before proceeding, save the closet by clicking on the “Save as” button, and giving it a name:
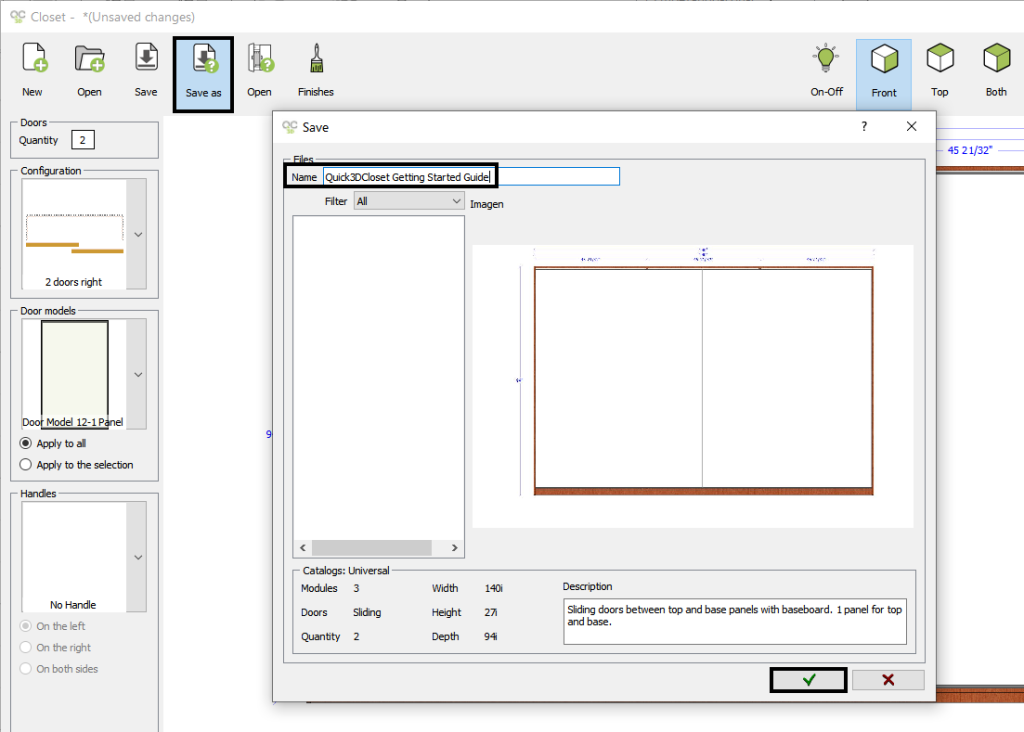
Now that the closet has been saved, select these options:

- Configuration: select the option “3 doors” .
- Door models: select the option “Door model 12 – 3 Panels” .
- Handles: select the option “Integrated 5” .
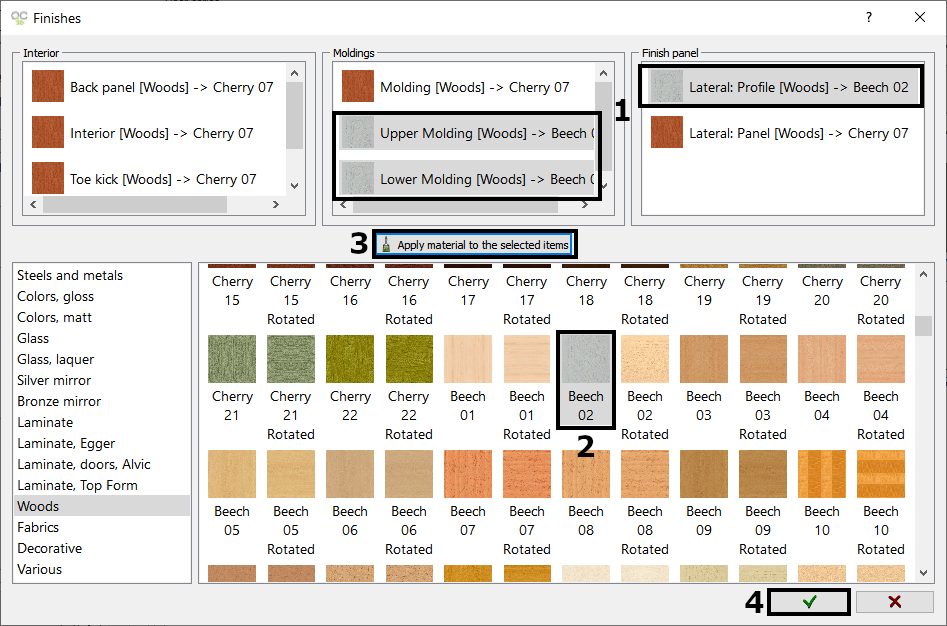
Finishes

- Select the elements “Door: Panel 1” and “Door: Panel 3” .
- On the left, select “Woods” .
- In the materials list, select “Betula 06 Rotated” .
- Click on “Apply” to apply the selected material to the chosen panels.

Let’s repeat the process, but this time select “Door: Panel 2” and apply the material “Woods -> Alder 03” :
Once the materials have been changed, click on “OK“.
Open the doors

- Select the central door.
- In “Distance (D)“, enter the value 20.
- Click this button to move the door to the left.
- Click OK.

Structure
In this stage, you can modify the structure of the closet: adjust the height, width, or depth of the modules, create a recess for the pillars, or add Top cabinet.
In this example, we are going to modify the width of the central module.
- On the left side under “Modify Structure“, select the option “Modify Width” .
- Double-click with the left button on the central module.
- A new window “Modify structure” appears. Click on the “Distance” field, and enter 50 inches.
- Accept the “Modify Structure” window for the changes to take effect.
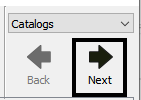
Click on the “Next” button to continue with the course.