Video-Tutorial
Auto distribution
The next stage of the design allows adding sets of predefined elements to each module of the closet.
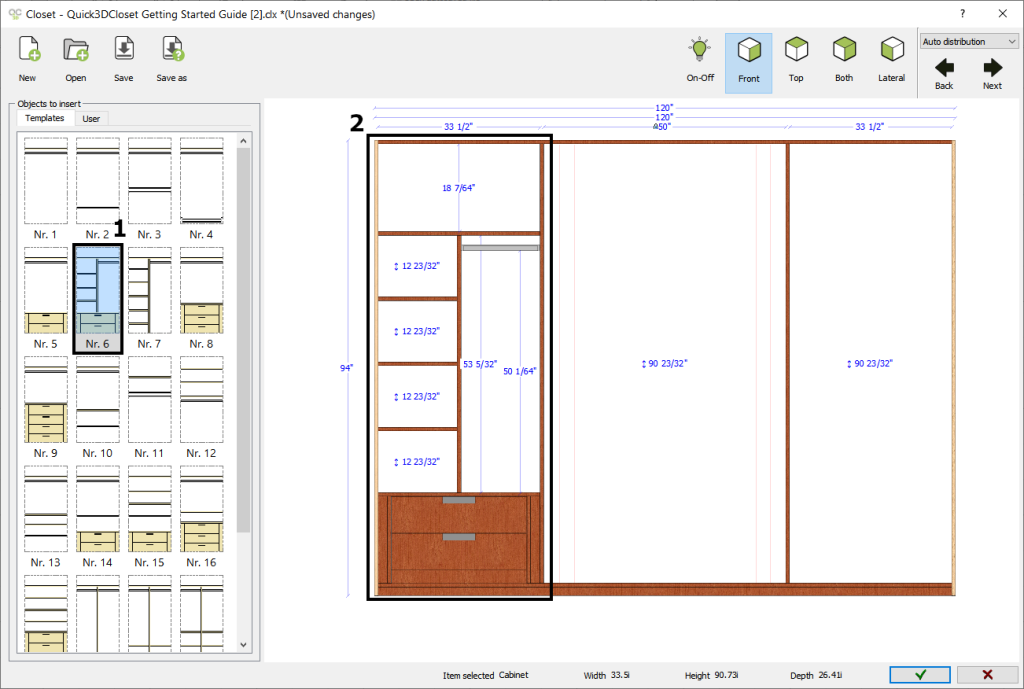
In the section “Objects to Insert” , 1) select option “Nr. 6“, and double-click on the first module of the closet (2) to add this layout to it:
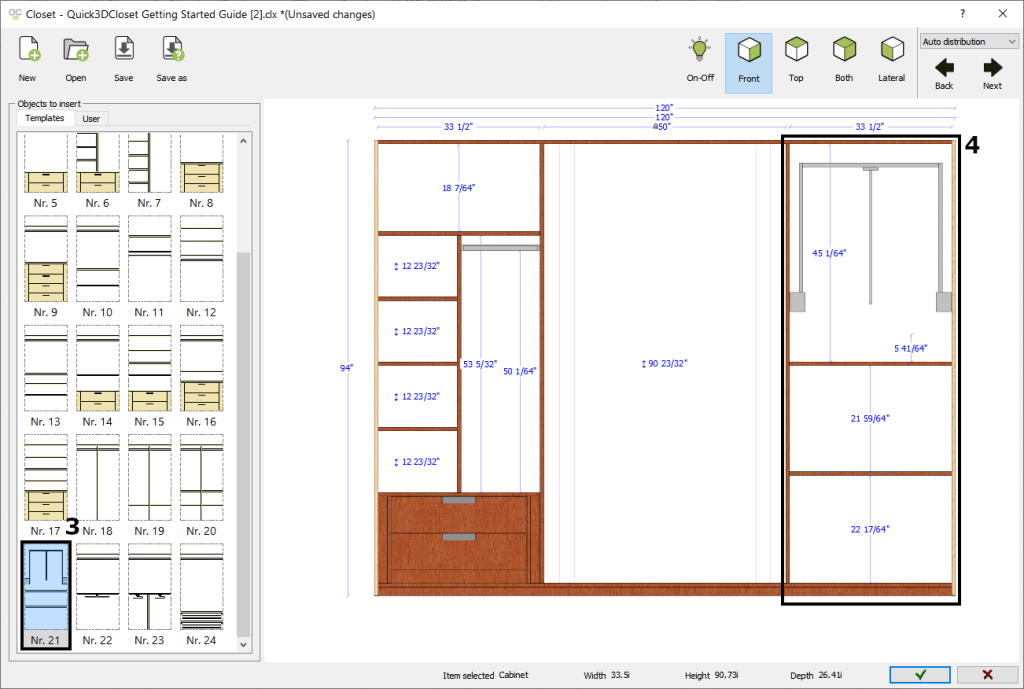
We repeat the process, 3) select option “Nr. 21” , and double-click on the third module to add this distribution of elements (4):


Distribution
At this stage, you can add the different elements that will be incorporated into our closet (drawers, shelves, accessories, bars, etc).
Under shelf rod
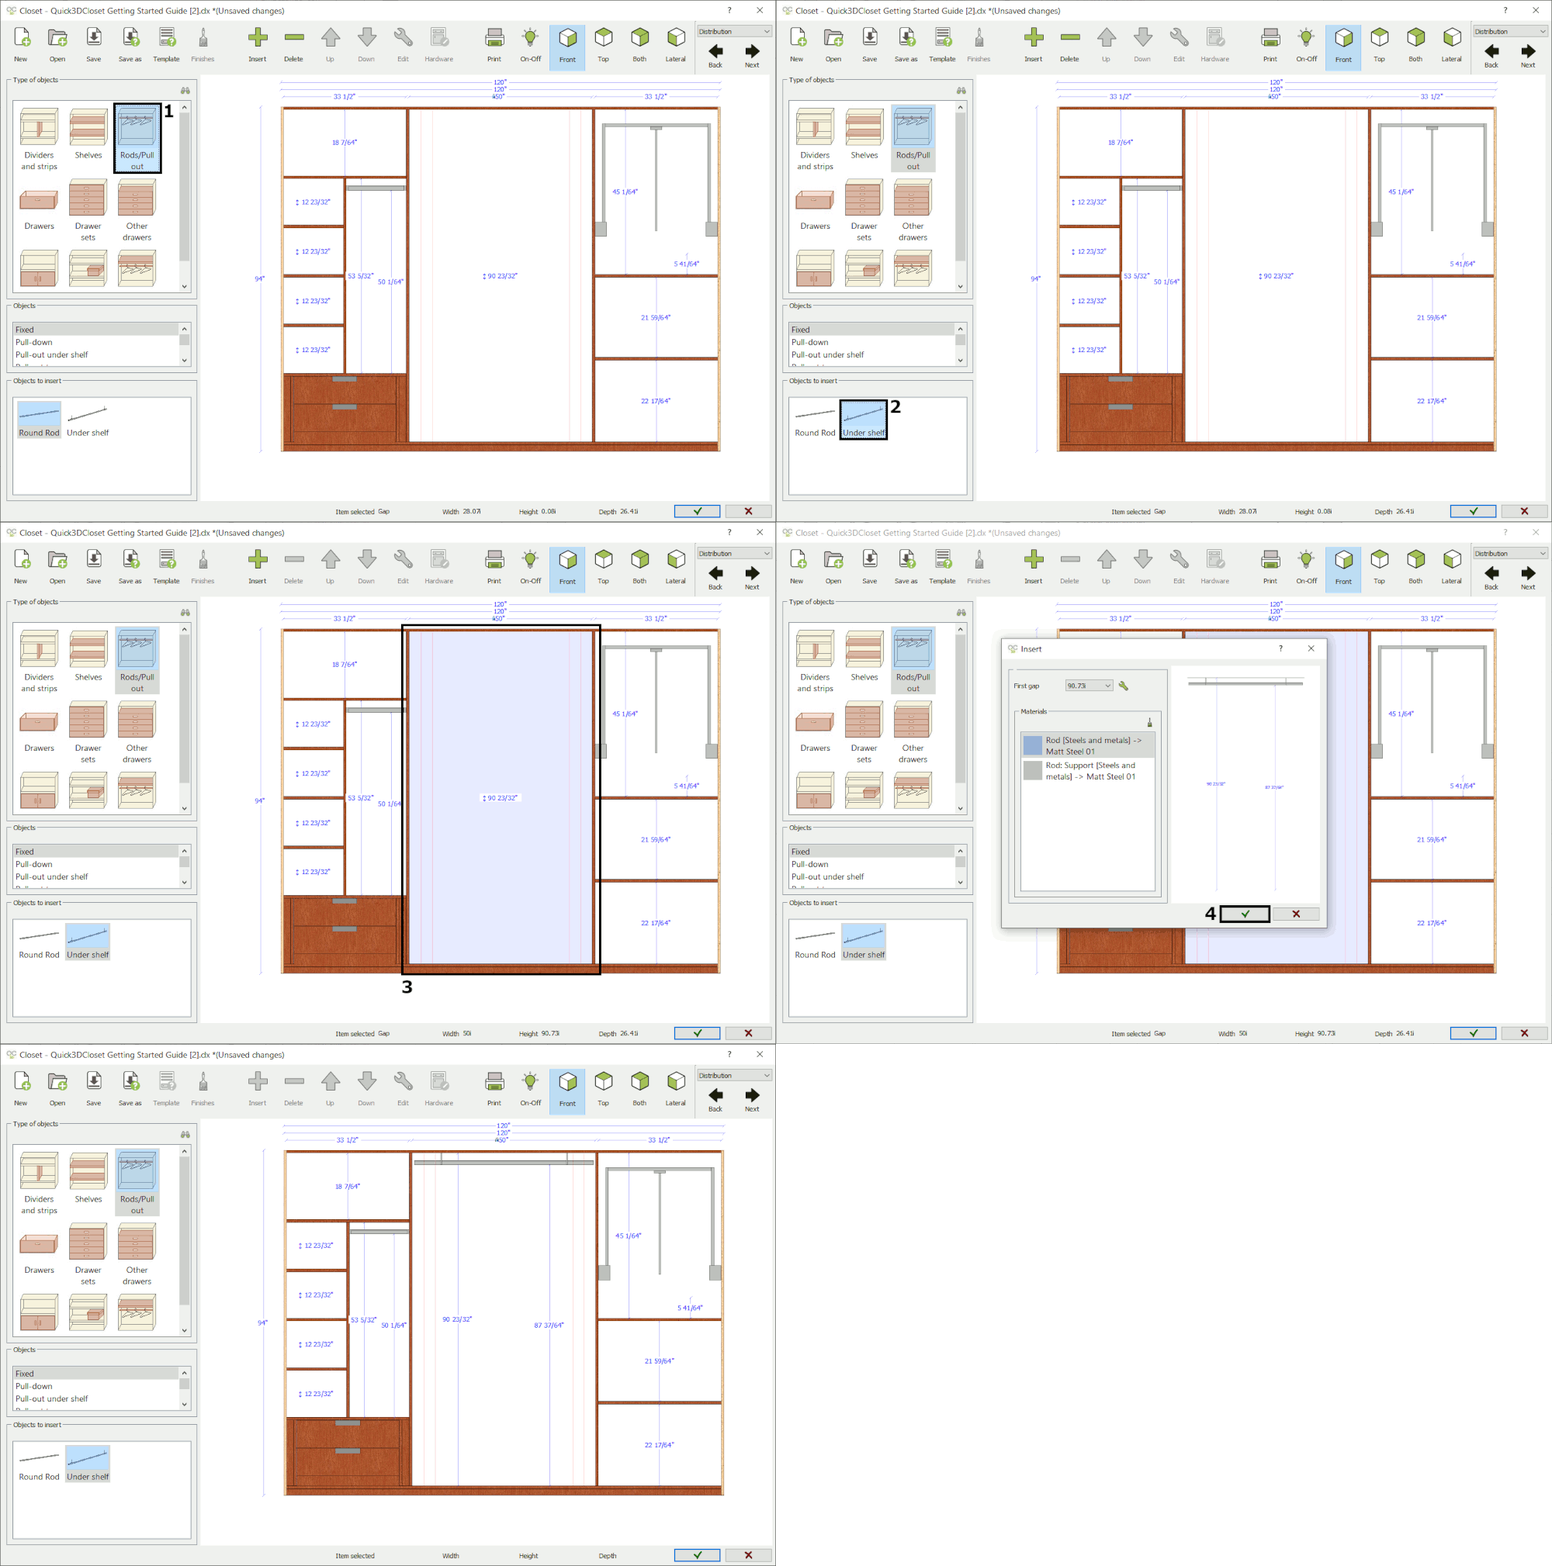
First, let’s place a “Under shelf rod” :
- Select “Rods/Pull Out” .
- Select the option “Fixed-> Under shelf“.
- Double-click on the central module to add the bar.
- Click on Accept in the insertion window.
Glass drawer open
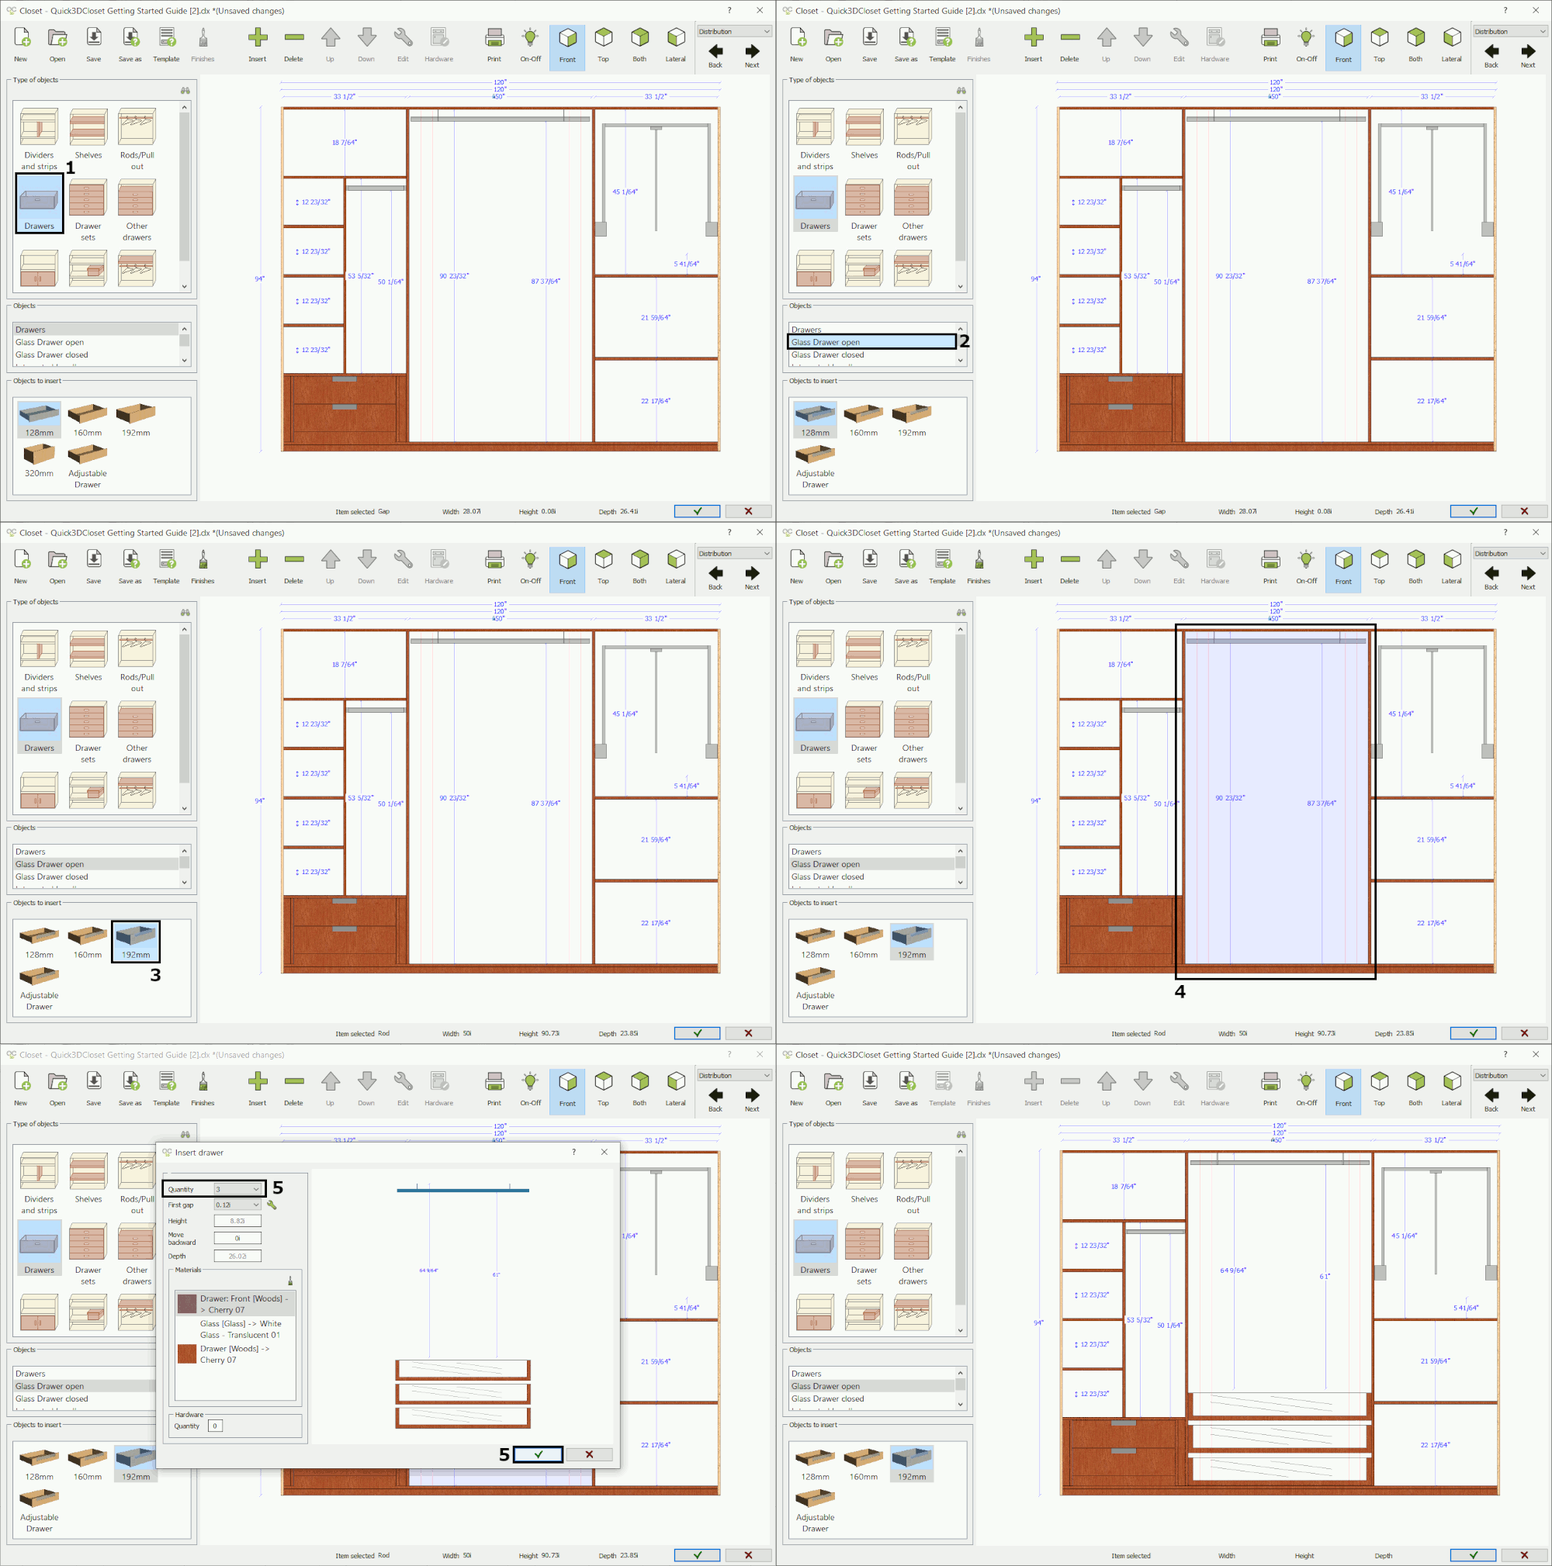
Now we are going to insert some “Glass Drawer open” :
- Select “Drawers” .
- Select “Glass Drawer open” .
- Select 192mm.
- Double-click on the central module to add the drawers.
- In the insertion window, select “Quantity” as 3 from the dropdown menu and click Accept.
Shelves
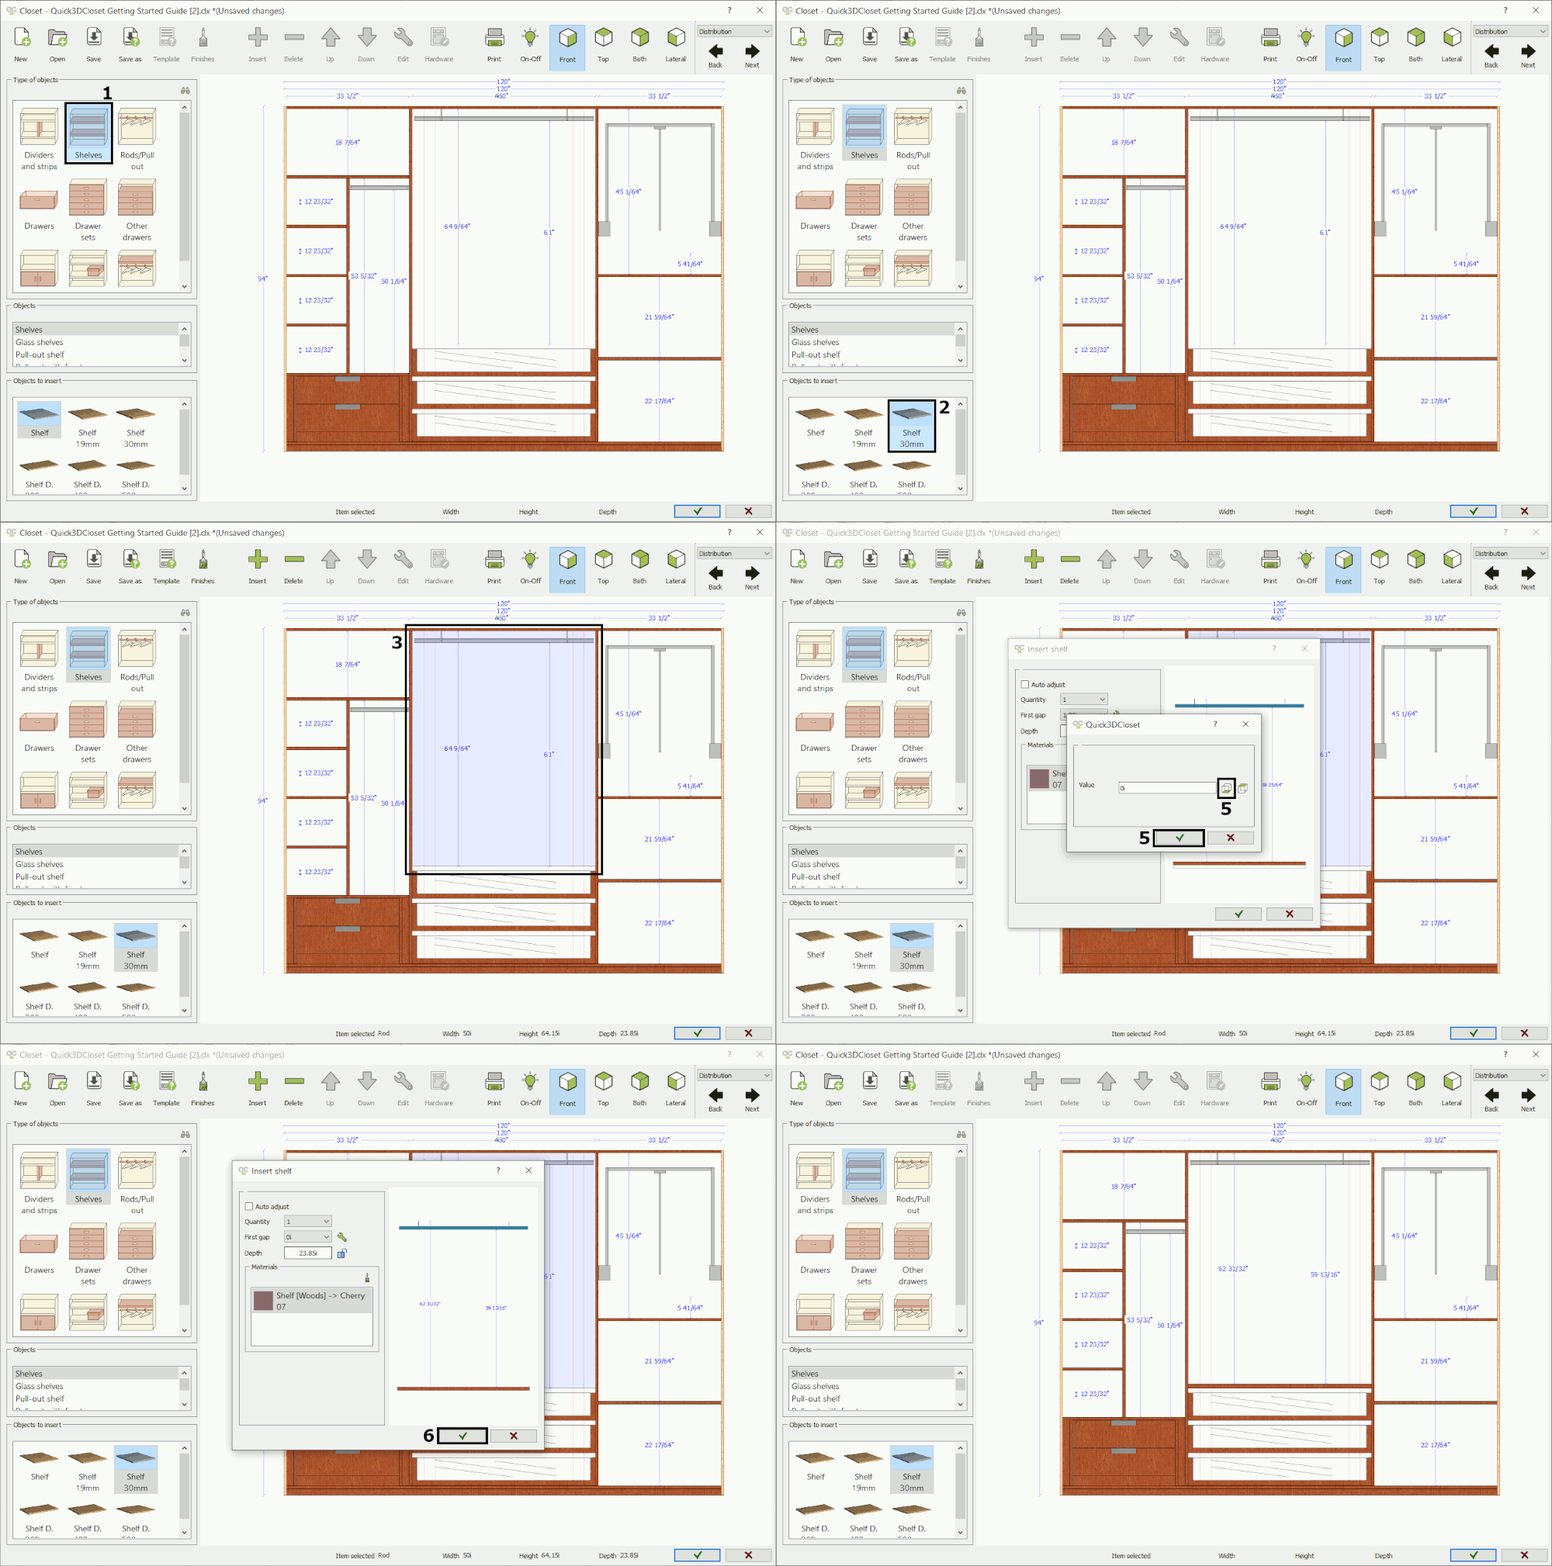
Now we are going to insert a “Shelf” above the drawers:
- Select “Shelves” .
- Select “Shelf 30mm” .
- Double-click on the central module to add the shelf.
- In the insertion window, in the “First space” field, click on the ‘wrench‘ icon.
- Click on this button to select the minimum value for the gap, 0cm.
- Finally, click Accept to insert the shelf.
Set of clothes
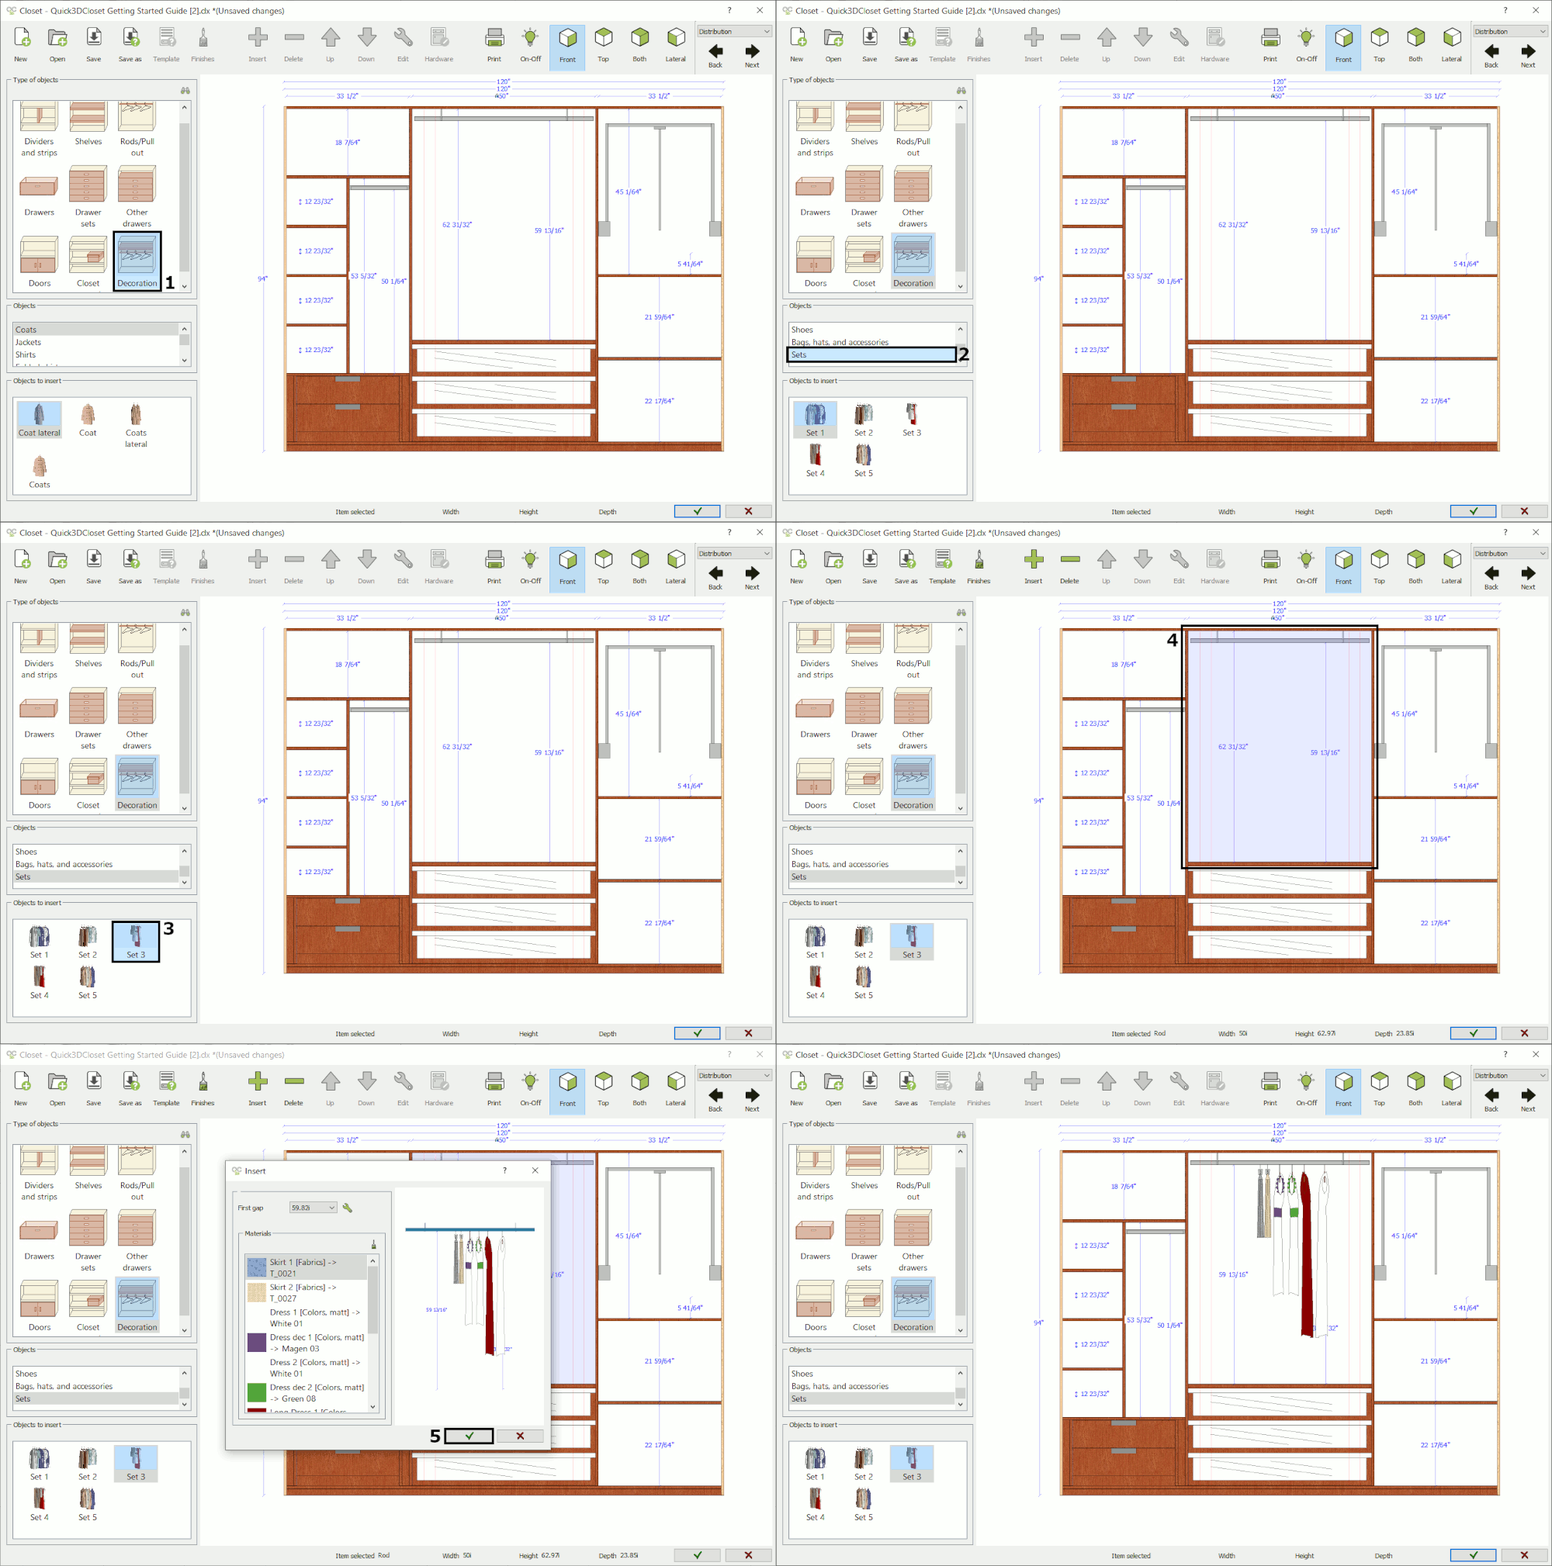
Finally, let’s insert a “Clothing set” to decorate the closet.
- Select “Decoration” .
- Select “Sets” .
- Select “Set 3” .
- Double-click on the central module to add the set.
- Click on Accept in the insertion window.


Detailed list
The next stage displays detailed information about the pieces that make up the closet (name, measurements, material, grain type, edging, etc…). At this stage, you can:
- Modify the list of “Increments/Decrements” that will be applied to the different pieces of the closet.
- Display the information of the closet parts with a dimensioned drawing.
- Group the pieces that are identical.
- Display the measurements in millimeters.
- Export the data of the closet pieces to a file for a cutting program.
- Print the information of the pieces.
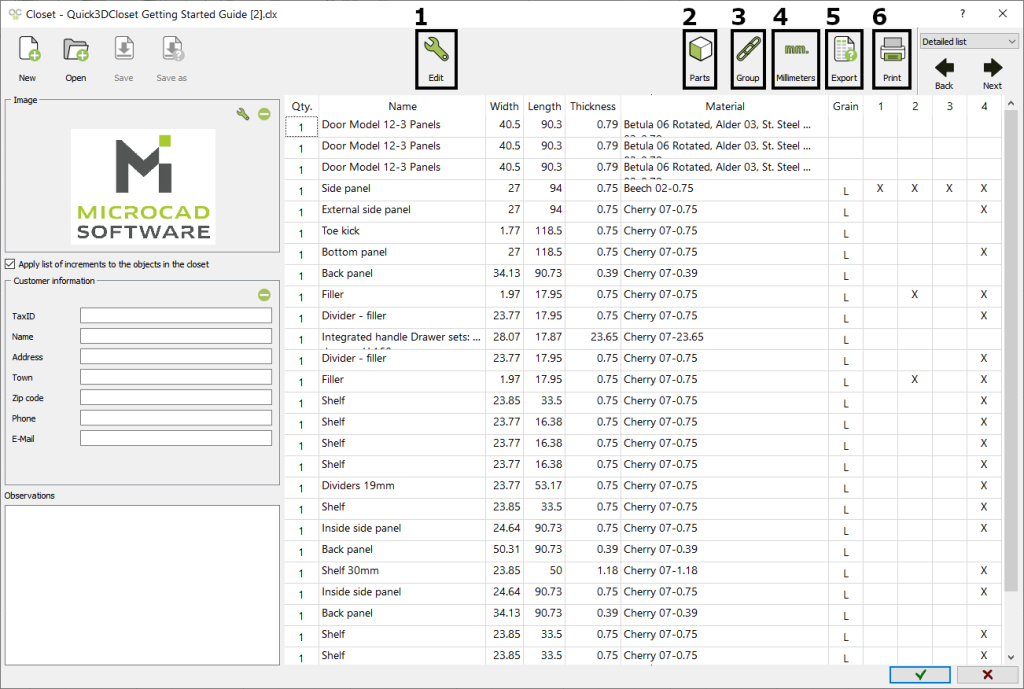
However, in this example, we are not going to do anything here.

Prices
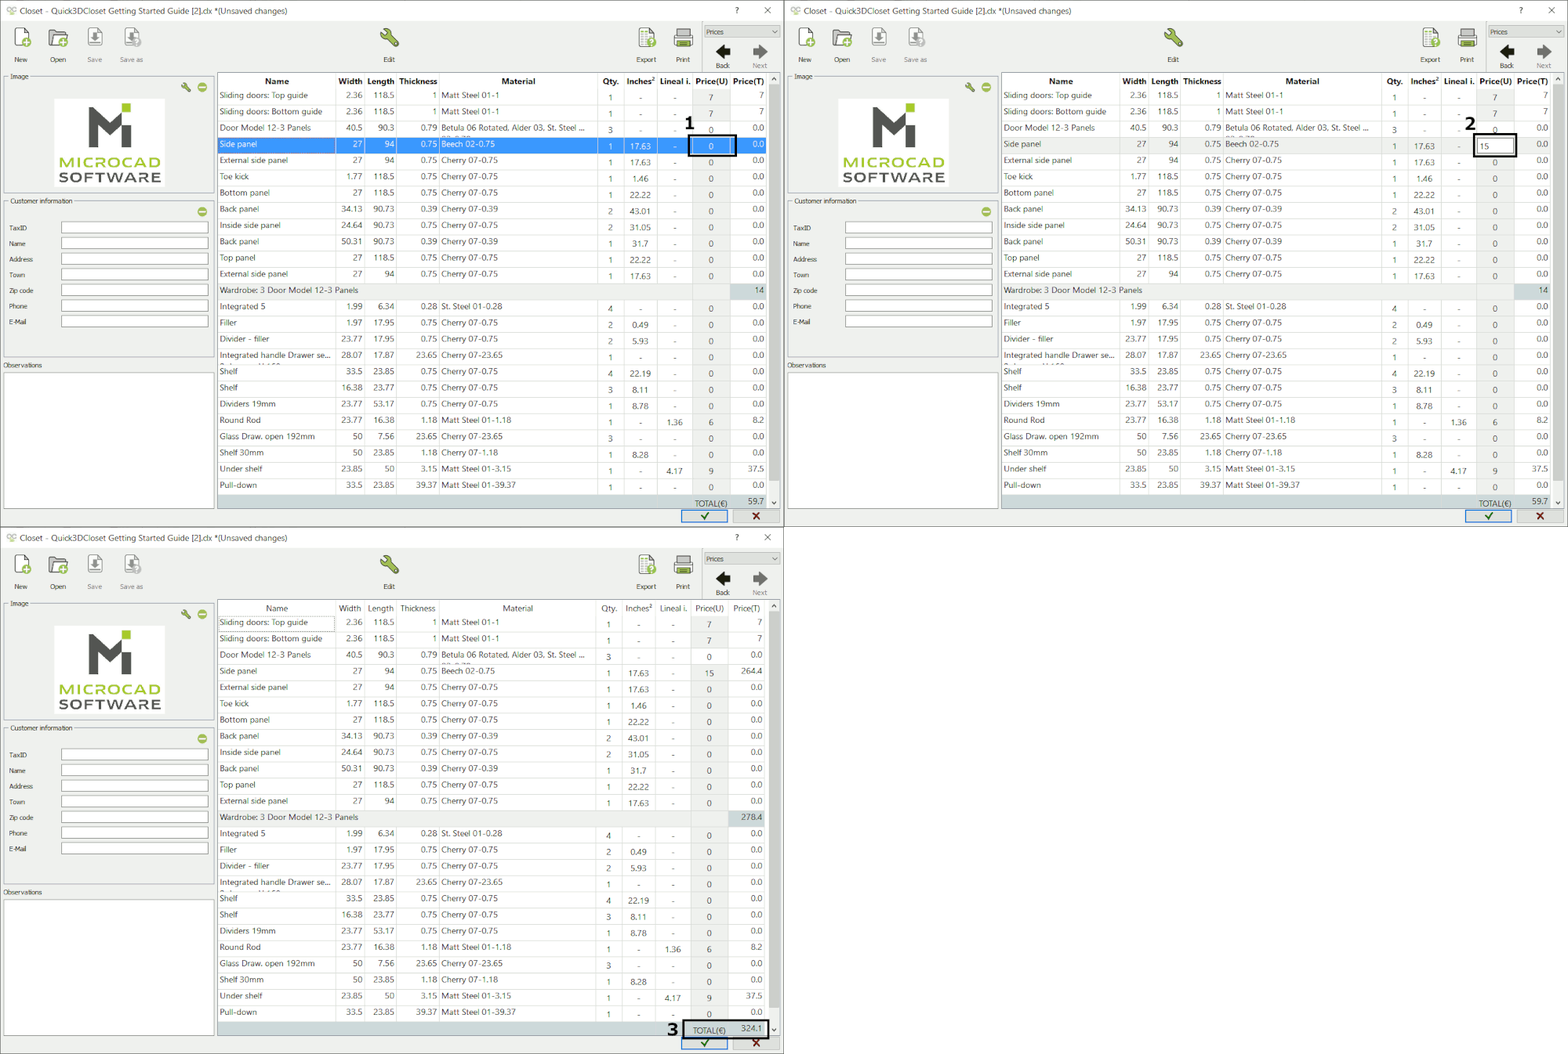
The last stage of the design allows you to create the closet budget, as well as export it to Excel format and print it. To change the price of the elements, follow these steps:
- Double-click on the “Price” field of the element you wish to change, “Side panel” in our example.
- Enter the price of this element, 15 in our example.
- Press Enter, and you will see the “Total” reflected with the new price you have entered.
- Repeat the process to configure the price for all the elements of the closet.

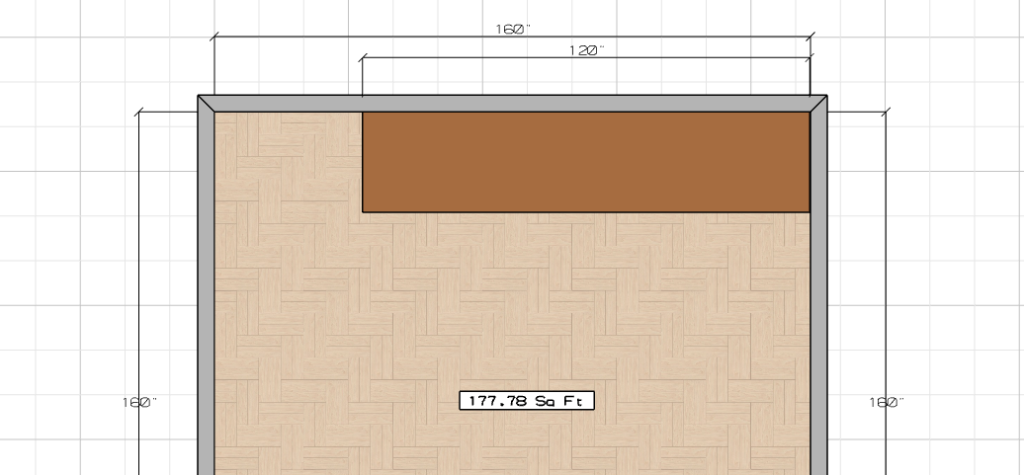
We will indicate the position of the closet by pointing to a point with the left mouse button. In this example, we place it in the upper right corner of the architecture:
Save project
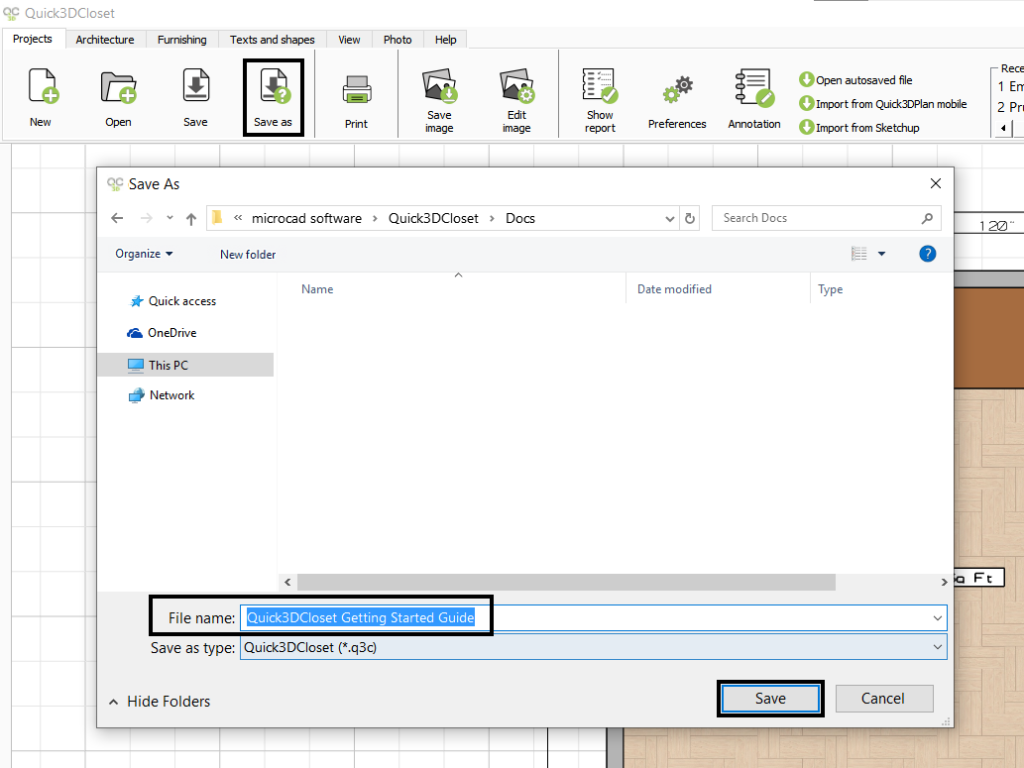
This is a good time to save the project by clicking on the “Save As” option and giving it a name:
Now let’s see how to change materials.
Click on the “Next” button to continue with the course.

