
Video-Tutorial
Create a perspective
Once our design is created, let’s see how to make views and perspectives to visualize it in 3D from different angles and see how it’s coming along.
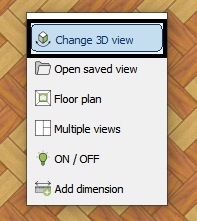
All tools related to creating views and perspectives, elevations, 2D and 3D views, etc., are located in the “View” tab:

To create a perspective, follow these steps:

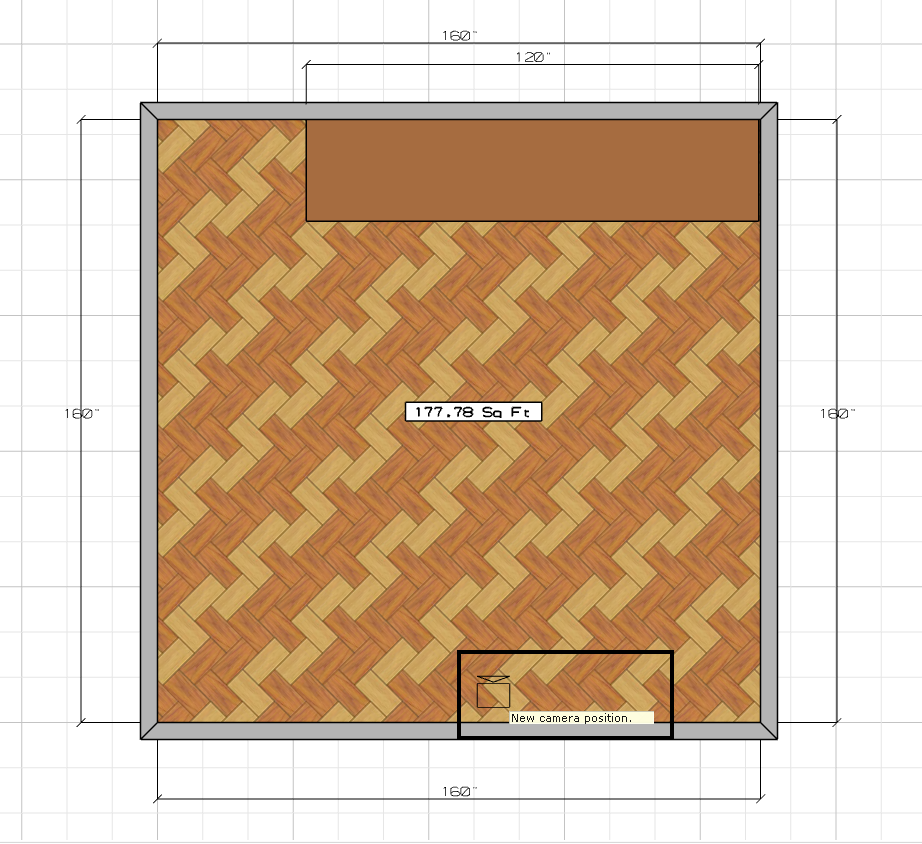
2. Below the mouse, you will see the message “New camera position“. Position the mouse approximately as shown in the lower image, which indicates the camera position:
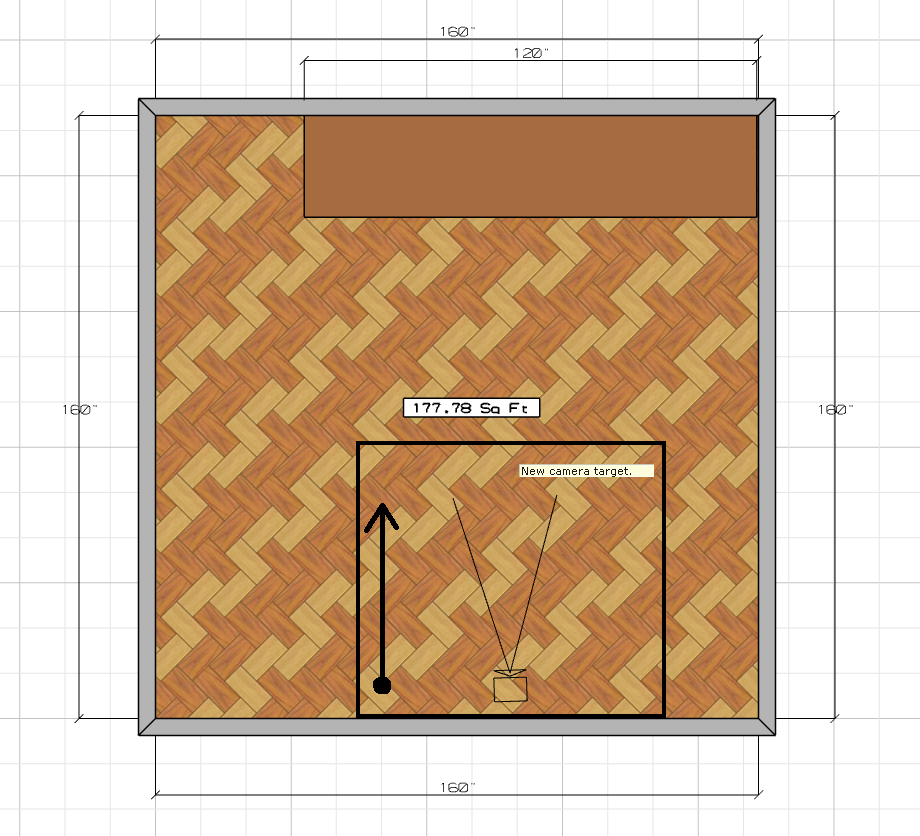
3. Click with the left mouse button, and without releasing it, move the mouse to direct where you want the camera to look. In our example, we “aim” the camera upwards to see the front of the kitchen:
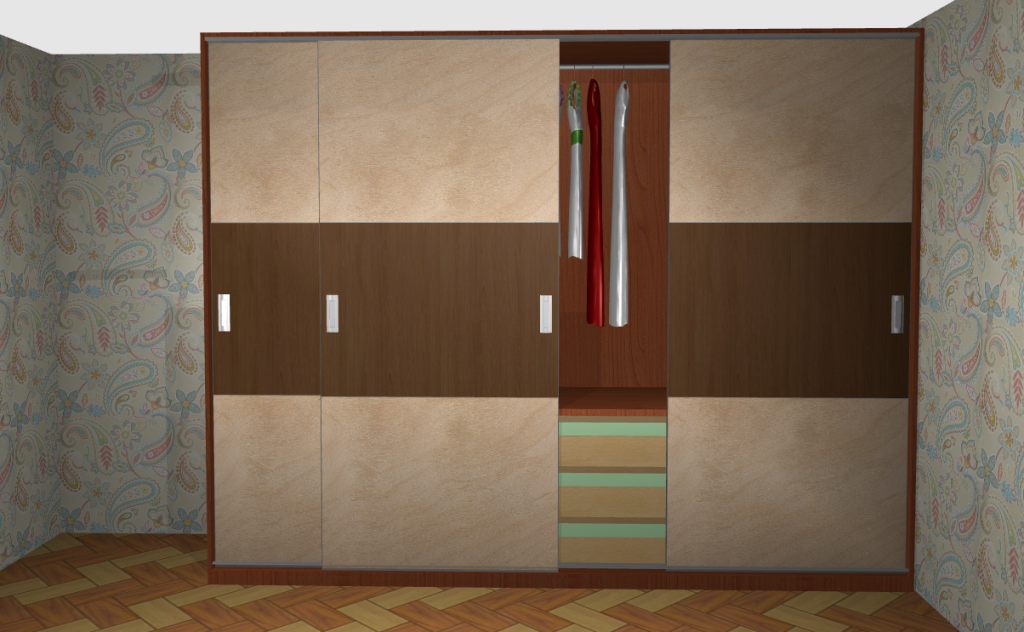
4. Once you are satisfied with the position of the camera and the direction it is “looking” at, release the left mouse button, and a 3D perspective of the design will be displayed:
Adjusting or modifying the perspective
This initial view can be adjusted using the buttons located in the bottom-right corner of the program window:
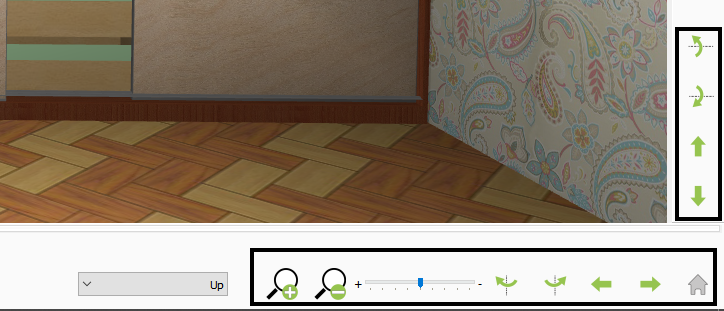
However, it’s easier to adjust the view directly using the mouse:
How to create views, perspectives, and elevations in Quick3DCloset
You can watch a more advanced video on how to create views and perspectives in Quick3DCloset here:
NOTE: Vídeo in Spanish made with Quick3DPlan, but the tools are the same in Quick3DCloset.
Save and retrieve a perspective
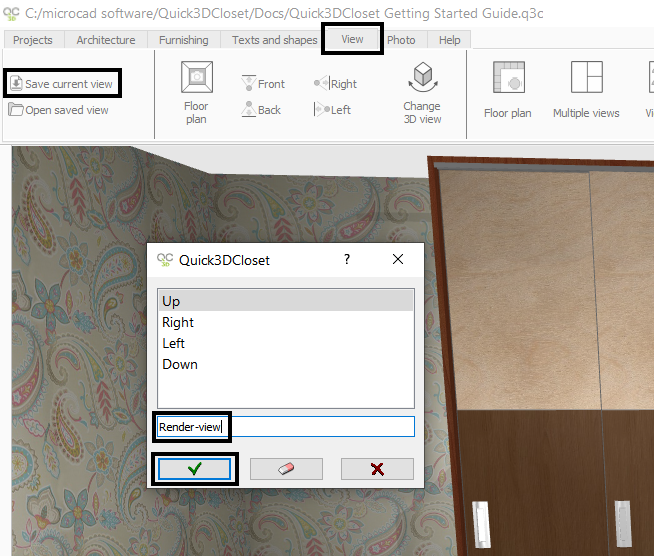
Once a perspective of the design is created, you can save it to retrieve it in the future. In our example, once a view showing the entire front of the kitchen is created, click on the option “View -> Save current view“, and name it: “Render-view“:
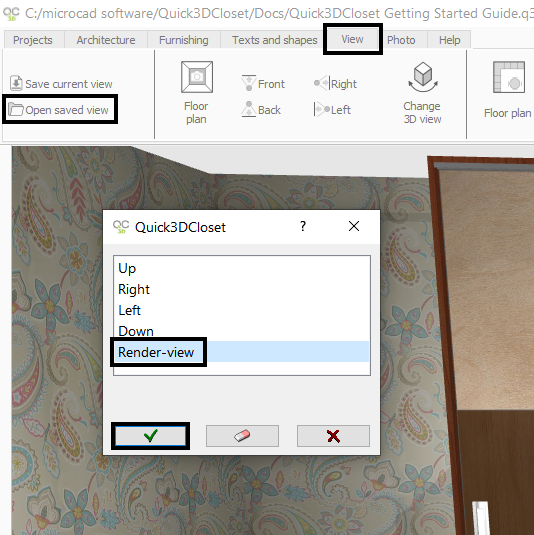
Later, you can retrieve these saved perspectives from the option “View -> Open saved view“:
Hide the closet doors
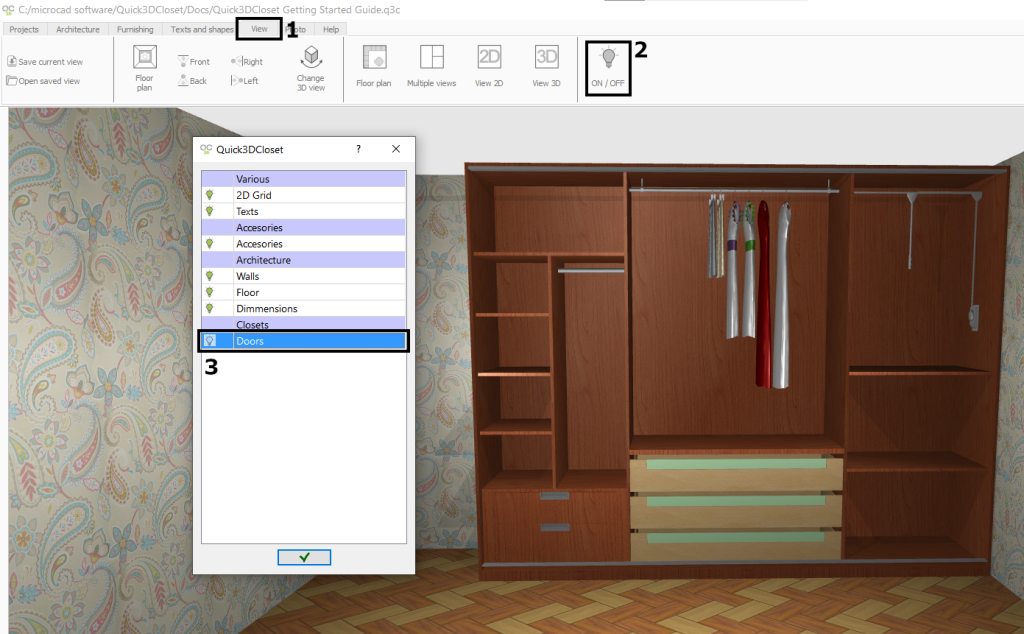
It’s possible to hide the closet doors to reveal the interior. To do this, click on the “View” tab (1), then on “ON / OFF” (2). In the new window that appears, click on the “Doors” option (3) to “hide” them and reveal the interior of the closet:
Plan view
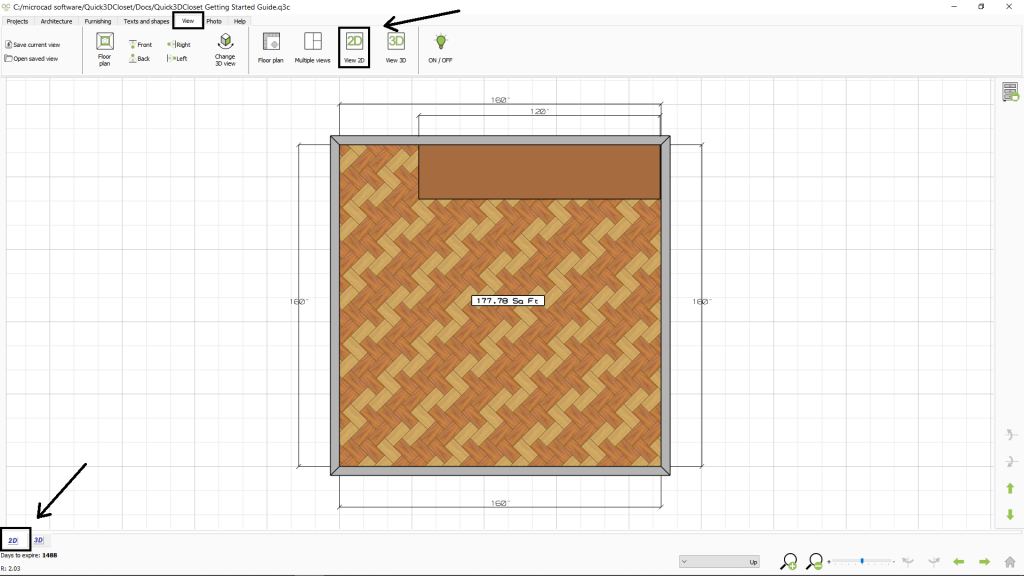
Finally, click on the “View -> View 2D” button or directly on the “2D tab” in the bottom left corner to switch the design to “floor plan” view:
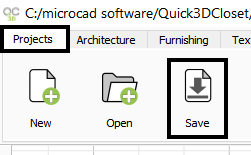
Save project
Now let’s see how to place lights in the design and make a render.
Click on the “Next” button to continue with the course.